
WHAT DOES SSL REFER TO? SSL (Secure Sockets Layer) for a travel website encrypts sensitive data, ensuring it remains private and secure. It builds trust, enabling users to confidently book flights, hotels and other travel services, knowing that their personal data is protected.
Now, the question arises How to add the SSL to your website?
A simple solution to acquire an SSL for your travel website free of cost is done via CLOUDFLARE.
Now, What is Cloudflare and how it works?
Cloudflare is a company that helps make websites faster, safer, and more reliable. They have services that store copies of your website in many places worldwide, so it loads quickly for people, regardless of where they are located. Cloudflare also protects your website from cyber-attacks and helps keep it secure.
Undoubtedly Cloudflare provides a plethora of benefits, some of which are:-
- Faster website: Cloudflare makes your website quicker for people by keeping copies in different places.
- Protection from attacks: Cloudflare helps prevent cyberattacks, like DDoS attacks, to keep your website online and safe.
- Free SSL certificate: Cloudflare provides a safety certificate for your website so that people can access it via a secure HTTPS connection.
- Firewall and security features: Cloudflare also offer tools to protect your website from common threats and keep it secure.
- Easy DNS management: Cloudflare allows you to easily control the DNS settings of your website.
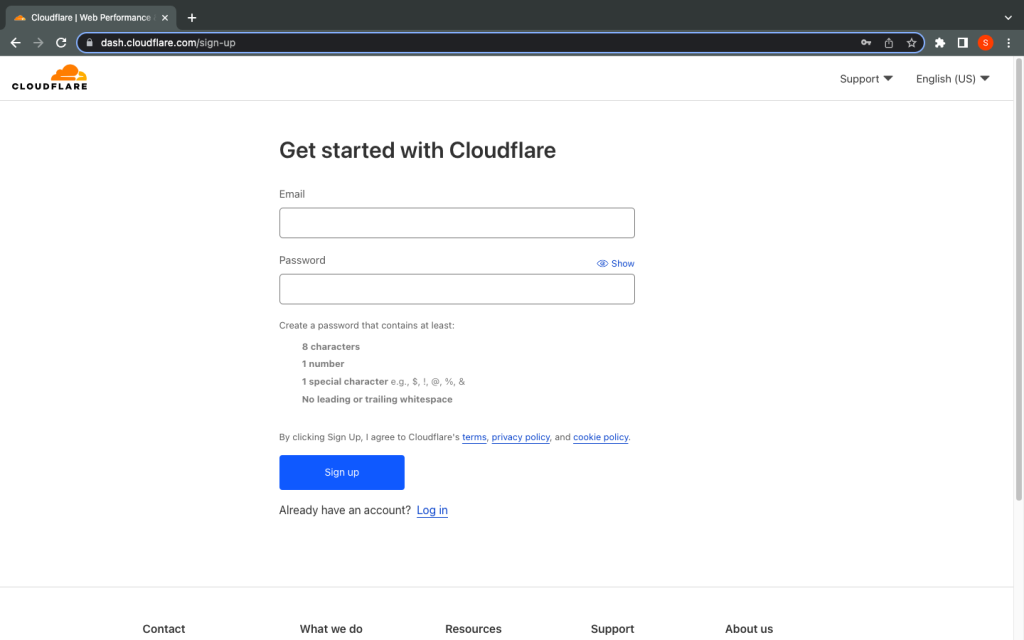
Adding site in Cloudflare: To use Cloudflare, you must create an account first by signing up on the site. (https://dash.cloudflare.com/sign-up). Then, simply add your domain in Add Website bar, and you are all set for the next steps.
To replace GoDaddy name servers with Cloudflare name servers, follow these steps:
- Log in to your GoDaddy account and find your domain in my products option.
- Look for the option to manage your DNS settings for the domain.
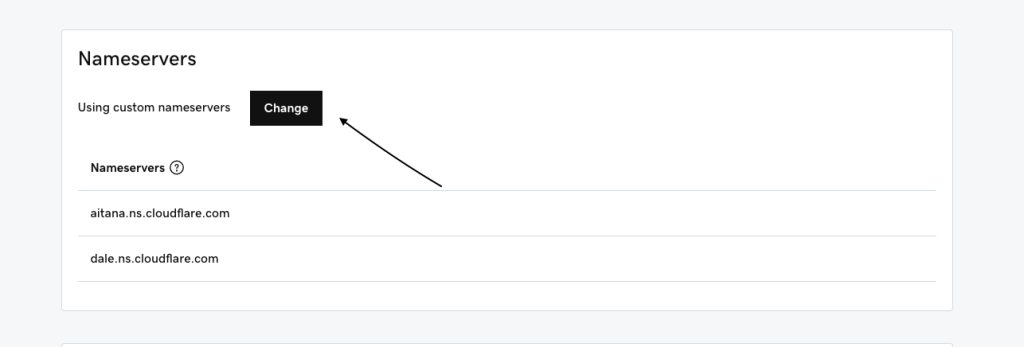
- Find the section that mentions nameservers and click the option to change them.
- Replace the existing Go Daddy nameservers with the ones provided by Cloudflare.
- Save the modifications and your domain will start using Cloudflare name servers.
You can refer to this video also, https://www.youtube.com/watch?v=hIJldDIYlCM
To configure SSL settings in Cloudflare, you need to perform a few steps:
- Log in to your Cloudflare account and add your site.
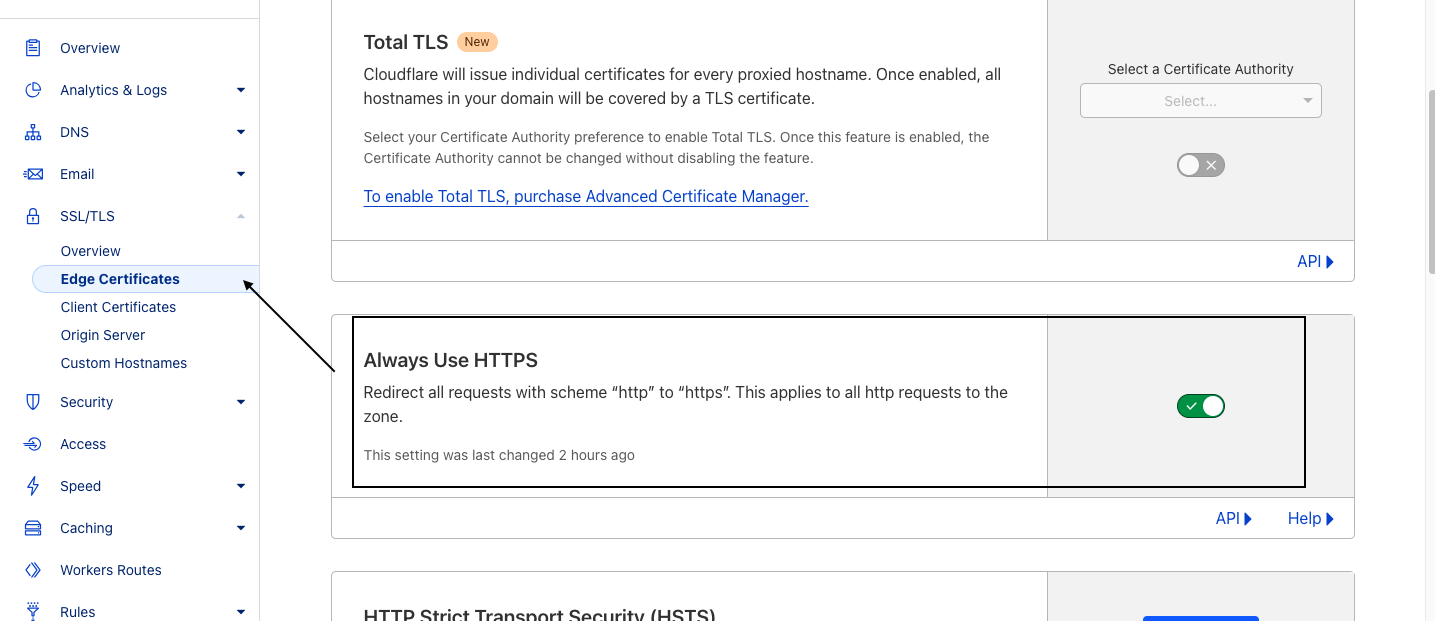
- Look for the SSL/TLS settings tab.
- Choose the SSL/TLS encryption mode you prefer. Choose the “Flexible” option(recommended).
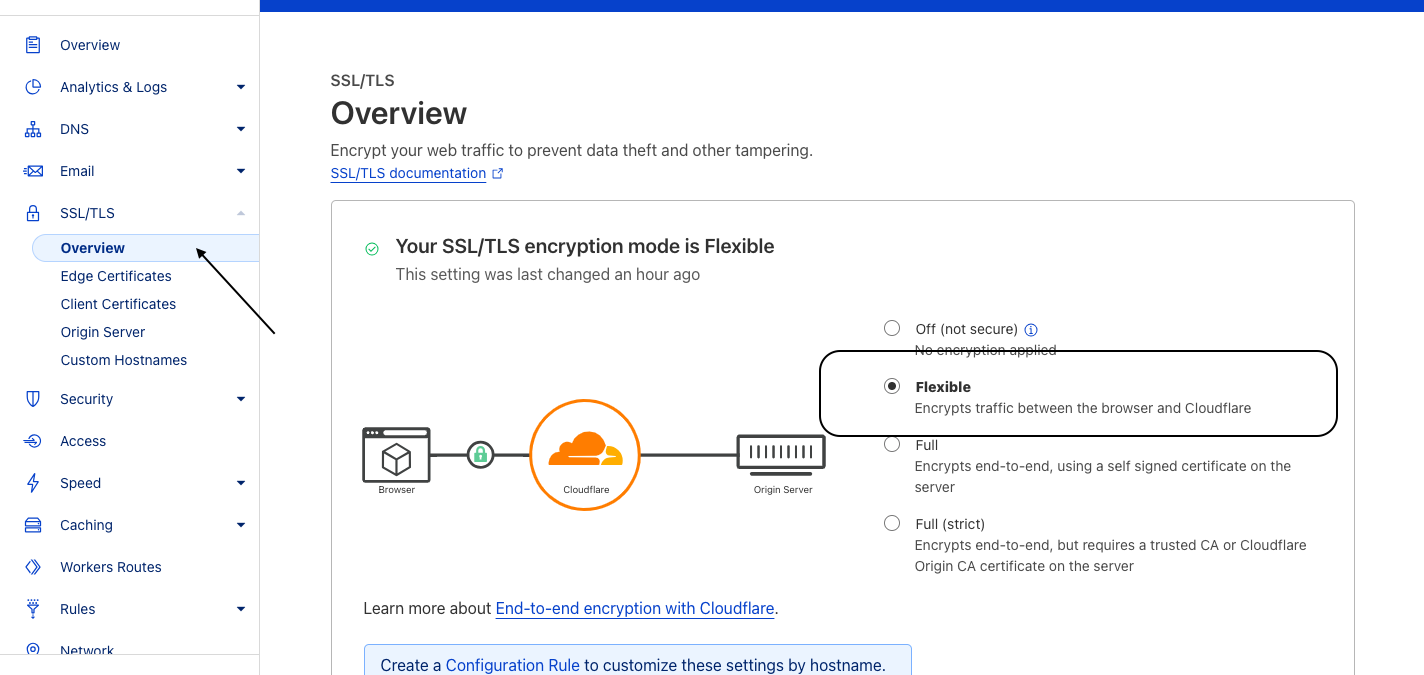
- Turn on the option to always use HTTPS. This ensures that visitors will access your website securely.
Keep in mind that it might take some time to propagate, please be patient.